

How I Automated Checking if an Item is Back In Stock
Have you ever wasted your life away checking if that item you've been eyeing for months is finally back in stock? Do you wish you could just live your life not obsessively checking over material things and be notified when something is available to purchase again?
If so, you may be in luck, because this was the exact scenario that led me to making something so that I'd never have to waste another moment checking a store's online website.
If you have coding experience, this will be a breeze! Take a look at this section for a high level overview and if you'd like, you could fill in the details yourself for a fun activity.
If you don't have coding experience, welcome! I promise it'll be at least kind of fun, if you're up for a little learning. I made this guide for you to dip your toes into this world. If you have any troubles at all, feel free to reach out to me. My goal is to make this easily digest- and understand-able.
Don't worry about the length of this tutorial, it's long because it is getting into nitty gritty details. Getting this up and running shouldn't take more than 15 minutes. It may be helpful to read the section in the appendix for new learners.
(If you've decided you're really not up for learning and just want the end product, this is for you.)
What you'll have at the end of this: A script running at the frequency of your choice, at a time of your choosing, that will send you an email when your specified item is back in stock.1
No more obsessively checking online store websites only to see the same item, still out of stock. I hope it's not just me that does that, 'cause then this whole thing would be pretty embarrassing.
Assuming I'm not the only obsessive shopper out there, let's get into it.
TL; DR At the end of this you'll have a program running at the frequency and time of your choice that will send you an email when your online item is back in stock.1
Table of Contents
-
- Things you'll need
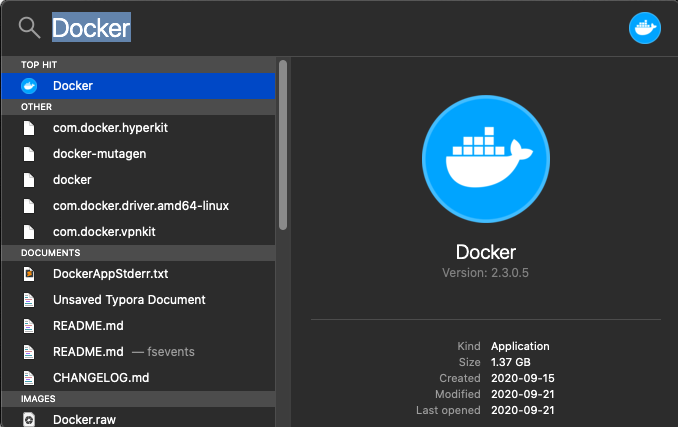
- Installing Docker
- Setting up the email address to send your notifications from (or use mine)
- Getting the code (Clone my repository)
- Modifying the code
- Testing the code
- Setting up the job
- Testing the job
- Things you'll need
Adding your own stores and links
- Tweaking the script and testing your tweaks
- Adding more links or online stores
Setup
Things you'll need
Docker
Install with Homebrew (a package manager for MacOS)
$ brew update
$ brew install docker
$ brew install docker-machine
Email address to send your main email address the notification2
- Call it yournamescripts@gmail.com, for example
- Create an app password to use for the script
Code
git clone3 my back in stock repository somewhere on your computer. I have it in a folder calledworkspacein my home directory.$ cd ~/workspace $ git clone git@github.com:jianajavier/back_in_stock.git
Modifying the Code
Change the email and password constants4 in the code.
Open the
back_in_stock/helpers/web_helper_methods.pyfileChange the constants in
helpers/web_helper_methods.pyTO_EMAIL = 'youremail@gmail.com' # Replace between quotes with your email address FROM_EMAIL = 'yournamescripts@gmail.com' # Replace between quotes with new email address from Step 1 APP_PASSWORD = 'password' # Replace between quotes with the app password you generated in Step 1
Testing the code
Verify that the example item in the link in
everlane.txtis in stock- If it isn't, find a similar item (on the same site) that is in stock and change the URL to that item.5
Ensure docker is running. If you're on a Mac, you'll most likely see the Docker icon in your menu bar.
You can also make sure by running this and making sure you don't get an error.
$ docker psMake sure you're in the
back_in_stockdirectory in the terminal (cdto the directory) and build6 the container,$ cd ~/workspace/back_in_stock $ docker build -t back_in_stock .and run7 the script
$ docker run -v /Users/jianajavier/workspace/back_in_stock:/back_in_stock back_in_stockYou should have received a Back in Stock! email at your
TO_EMAIL
Setting up the job
You can either set this up via cron or (as I have it) a Launch Daemon on MacOS
- Create this file:
/Library/LaunchDaemons/local.back_in_stock.plist
<?xml version="1.0" encoding="UTF-8"?>
<!DOCTYPE plist PUBLIC "-//Apple//DTD PLIST 1.0//EN"
  "http://www.apple.com/DTDs/PropertyList-1.0.dtd">
<plist version="1.0">
<dict>
    <key>Label</key>
    <string>local.back_in_stock</string>
    <key>ProgramArguments</key>
    <array>
        <string>/usr/local/bin/docker</string>
        <string>run</string>
        <string>-v</string>
        <string>/your/absolute/path/back_in_stock:/back_in_stock</string>
        <string>back_in_stock</string>
    </array>
    <key>WorkingDirectory</key>
    <string>/your/absolute/path/back_in_stock</string>
    <key>StartCalendarInterval</key>
    <dict>
        <key>Hour</key>
        <integer>22</integer>
        <key>Minute</key>
        <integer>24</integer>
    </dict>
    <key>StandardErrorPath</key>
    <string>/your/absolute/path/back_in_stock/logs/back_in_stock.err</string>
    <key>StandardOutPath</key>
    <string>/your/absolute/path/back_in_stock/logs/back_in_stock.out</string>
</dict>
</plist>
This file is used to tell our computer when to run our program
- It says to run our program at 10:24PM every day
- It redirects output or errors to the files in
/your/absolute/path/back_in_stock/logs/. Change this to be the absolute path where you put yourback_in_stockcode.8
Now I need to
loadthis configuration file usinglaunchctl.$ launchctl load -w /Library/LaunchDaemons/$(ls /Library/LaunchDaemons/ | grep back_in_stock)'Anytime I make a change to this configuration file (
/Library/LaunchDaemons/local.back_in_stock.plist), I need tounloadand thenloadit again.I set up an alias9 to run this more easily. This means when I enter the command
reload_back_in_stock, any changes I make to the launch daemon will be applied.10$ alias reload_back_in_stock='launchctl unload -w /Library/LaunchDaemons/$(ls /Library/LaunchDaemons/ | grep back_in_stock) && launchctl load -w /Library/LaunchDaemons/$(ls /Library/LaunchDaemons/ | grep back_in_stock)' $ reload_back_in_stock
- Create this file:
Testing the job
Set up the script to run a few minutes from the current time to test
    <dict>
        <key>Hour</key>
        <integer>21</integer>
        <key>Minute</key>
        <integer>03</integer>
    </dict>
Make sure the alias from the previous step is set up, and then reload.11
$ reload_back_in_stockSee the e-mail in your inbox (if it worked)
- If it didn't, shoot me a message so we can try troubleshooting together!
Now you're all set up to add your own stores and links!
Adding your own stores and links
This will differ from website to website. I'll give you the general toolbox that should get you where you want to be, but if you still run into trouble and would really like to do this, message me, and I'll do my best to help you out!
I plan to create a video to demonstrate this better, so let me know if you think that would be helpful!
Tweaking back_in_stock.py for an online item that contains details in link
I've been eyeing these Lululemon leggings for months now and they just never seem to come back in stock.
Within this link, you can see color=26083&sz=4, which means I don't have to click anything in the browser to specify my colour or size, it's contained within the link itself.
This is the easiest type of online item because all we'll need to do is check if the "Add to Bag" button is enabled.
Steps
Put the link in a text file. Here I am going into my
back_in_stockdirectory and putting the link in a text file calledlululemon.txt.$ cd ~/workspace/back_in_stock $ echo 'https://shop.lululemon.com/p/women-pants/Align-Pant-Tall/_/prod9410008?color=26083&sz=4' >> lululemon.txtlululemon.txtfile:https://shop.lululemon.com/p/women-pants/Align-Pant-Tall/_/prod9410008?color=26083&sz=4Add a method to
back_in_stock.pyto uselululemon.txt12TODAYS_DATE = datetime.today().strftime('%Y-%m-%d') SCREENSHOT_NAME = "back_in_stock_screenshot_%s.png" % TODAYS_DATE # This is the everlane method def everlane(driver): f = open("everlane.txt", "r") ### ... # Our new lululemon method def lululemon(driver): f = open("lululemon.txt", "r") # This gets the text file for link in f: # Loop through each link in the text file (we are starting with one) link = link.strip("\n") # Remove the new line character at the end of each line driver.get(link) # Use the selenium web driver to get the linkGet the add button
Go onto the Lululemon page), right-click on the Add to Bag button and click Inspect. This will show you the page's source code/html. We want to look for the html that makes up the Add to Bag button
In our case, the html looks like this:
<button class="button-1xp0M lll-text-button add-to-bag buttonPrimary-2q4bX" type="button" data-lulu-track="pdp-add-to-bag-regular-enabled">Add to Bag</button>How I read the above HTML:
- The Add to Bag button is a
buttonelement with- classes:
button-1xp0M, lll-text-button, add-to-bag, andbuttonPrimary-2q4bX - type:
button - data attribute:
data-lulu-trackwith value"pdp-add-to-bag-regular-enabled"
- classes:
All of these classes:
button-1xp0M lll-text-button add-to-bag buttonPrimary-2q4bXare names I can use to find this element in my program.
My intuition tells me that other buttons on the page are likely to share some of the other classes on this button (I.e.
button-1xp0Morlll-text-button), since classes can determine common elements like styling and positioning.I aim to choose the one most specific to the Add to Bag button. In this case, that will be the
add-to-bagclass.This tells me that in my script, I can use Selenium13 to find the button element by it's class name.14
I'll be using this method:
find_element_by_class_name('add-to-bag')- The Add to Bag button is a
Add the line to
back_in_stock.py. I also included adding error handling so our program won't crash if it can't find the button.# Our new lululemon method def lululemon(driver): f = open("lululemon.txt", "r") for link in f: link = link.strip("\n") driver.get(link) try: add_button = driver.find_element_by_class_name('add-to-bag') # Find by class name except NoSuchElementException: # Error handling passLook at what distinguishes an out of stock page from a back in stock page
- Find an item on the site that is in stock to confirm that the only difference is that the Add to Bag button is enabled
Now that we've found the add button element, let's check if the add button is enabled through the code:
def lululemon(driver):
    f = open("lululemon.txt", "r")
    for link in f:
          link = link.strip("\n")
        driver.get(link)

        try:
            add_button = driver.find_element_by_class_name('add-to-bag')

            if add_button.is_enabled(): # Check if enabled
                # This is where we will want to save a screenshot and email ourselves

        except NoSuchElementException:
            pass
Use methods
save_screenshotandsend_emailfromhelpers/web_helper_methods.pyto save the screenshot and email yourTO_EMAIL. This will be a common step among all websites. This tells our program to save a screenshot and send us an email if the Add Button is enabled.def lululemon(driver): f = open("lululemon.txt", "r") for link in f: link = link.strip("\n") driver.get(link) try: add_button = driver.find_element_by_class_name('add-to-bag') if add_button.is_enabled(): save_screenshot(driver, SCREENSHOT_NAME) send_email(prepare_email(link)) except NoSuchElementException: passCall your new method in the main method of the program.
def main(debug): driver = initialize_driver(debug) everlane(driver) lululemon(driver)Test18 your method. Change the condition by adding
notsince the item is not in stock and you just want to test the code.def lululemon(driver): f = open("lululemon.txt", "r") for link in f: link = link.strip("\n") driver.get(link) try: add_button = driver.find_element_by_class_name('add-to-bag') if not add_button.is_enabled(): # Change to not for testing save_screenshot(driver, SCREENSHOT_NAME) send_email(prepare_email(link)) except NoSuchElementException: passRun the code. You should receive an email.
$ docker run -v /Users/jianajavier/workspace/back_in_stock:/back_in_stock back_in_stock
Tweaking back_in_stock.py for an online item that does not contain details in link
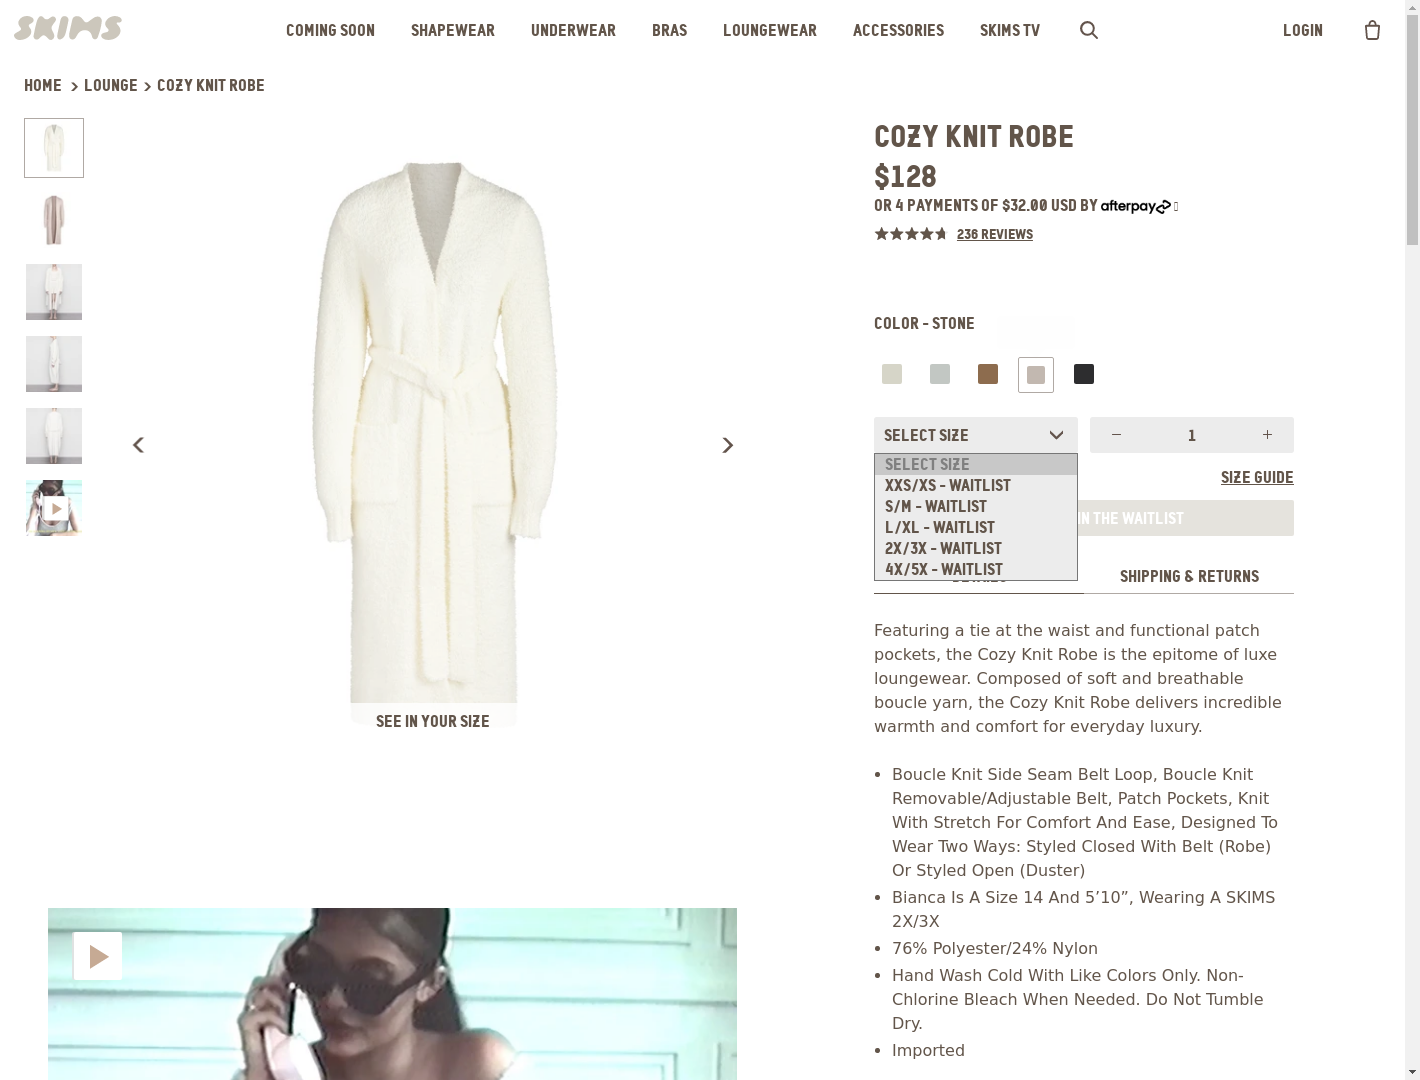
Now let's say I've been monitoring this robe but everytime I want to purchase it, it's out of stock. This item differs from the previous one because I need to click the colour and size I want before checking if it's in stock.
I know this website has a "Join the Waitlist" option but not all do, and this is more to demonstrate the concept for two different types of websites.
UPDATE: Since I've written this, the website has changed so the code is outdated. You can still read on as it will give you versatility in handling different websites. The final code can be found in the back_in_stock_final.py file.
Steps
Put the link in a text file. Here I am going into my
back_in_stockdirectory and putting the link in a text file calledskims.txt.$ cd ~/workspace/back_in_stock $ echo 'https://skims.com/products/cozy-knit-robe-stone' >> skims.txtskims.txthttps://skims.com/products/cozy-knit-robe-stoneAdd a method to
back_in_stock.pyto handleskims.txtTODAYS_DATE = datetime.today().strftime('%Y-%m-%d') SCREENSHOT_NAME = "back_in_stock_screenshot_%s.png" % TODAYS_DATE # This is the everlane method def everlane(driver): f = open("everlane.txt", "r") ### ... # Our new skims method def skims(driver): f = open("skims.txt", "r") # This gets the text file for link in f: # Loop through each link in the text file link = link.strip("\n") # Remove the new line character at the end of each line driver.get(link) # Use the selenium web driver to get the linkIn your main method, call the new method
def main(debug): driver = initialize_driver(debug) everlane(driver) lululemon(driver) skims(driver)-
Right-click on the colour you want and click Inspect Element.

How I read the above HTML:
- The Color button is a
buttonelement that- has classes:
config__color-btn, btn-icon, is-visible15 - contains a
spanelement that has- classes:
config__color-inner,swatch, andis-visible - data attributes:
data-colorwith value"STONE"data-contentwith value"waitlist"
- classes:
- has classes:
What this tells me:
- There is no "simple" way to use Selenium's simplistic
find_bymethods like we did in the Lululemon example data-colorwithin thespanis the defining attribute on the button
- The Color button is a
For now, we can use what I think is the simplest for this purpose (
find_element_by_xpath). Let's put this in our code first.def skims(driver): f = open("skims.txt", "r") for link in f: link = link.strip("\n") driver.get(link) color_button = driver.find_element_by_xpath("") # Add this lineThen we need to get the absolute xpath of this element.
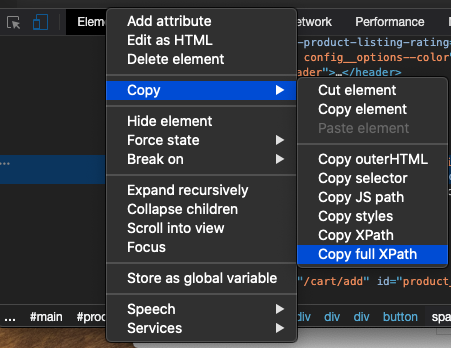
Paste it within the empty quotes on the line we just added.16
def skims(driver):
    f = open("skims.txt", "r")

    for link in f:
        link = link.strip("\n")
        driver.get(link)

        color_button = driver.find_element_by_xpath("/html/body/main/section[1]/div/div/section[1]/div/div[2]/div[3]/div/button[4]/span[1]")
At this point, I would test my code.
During testing, I realized I was getting an error because a popup was showing up on the page, making me unable to click the color button. After testing, we end up with the code to click the color button and handle any errors if they come up.
def skims(driver):
    f = open("skims.txt", "r")

    for link in f:
        link = link.strip("\n")
        driver.get(link)

        color_button_xpath = "/html/body/main/section[1]/div/div/section[1]/div/div[2]/div[3]/div/button[4]/span[1]"

        try:
            ActionChains(driver).send_keys(Keys.ESCAPE).perform()

            color_button = driver.find_element_by_xpath(color_button_xpath)
            color_button.click()
        except ElementClickInterceptedException:
            save_screenshot(driver, SCREENSHOT_NAME, 'error')
            print('Error - saved screenshot')

        print('Success')
Now that we've clicked the colour, let's pick our size.
UPDATE: Since I've written this, the website has changed the way to choose size. It is much easier now (just clicking a button). You can still read on as it will give you versatility in handling different websites. But if you prefer, you can repeat the color-choosing steps above for the size. And then check out the final code in the back_in_stock_final.py file.
We'll move on as if the website didn't change. First, let's think about how we, as humans, do this before we figure out how we'll tell Selenium to.
As humans, we first click the select dropdown.
- We don't need to go as far as clicking it if we already see that it says WAITLIST or SOLD OUT beside the size text
- If we see WAITLIST or SOLD OUT on the size we want, we don't need to click anything
- This is different from the Everlane example because we don't need to check if the "Add to Bag" button is enabled in order to see if it's in stock
- In fact, the "Add to Bag" button doubles as a "Waitlist" button if the item is sold out, so if we did the same thing and checked if the "element with
id="bagBtnProduct""is_enabled?, we would not be getting the correct answer - We need a different approach for this one
- In fact, the "Add to Bag" button doubles as a "Waitlist" button if the item is sold out, so if we did the same thing and checked if the "element with
First, let's get the Selenium code to click the dropdown. Repeat the same steps to click the color button. You should end up with something like this:
def skims(driver):
    f = open("skims.txt", "r")

    for link in f:
        link = link.strip("\n")
        driver.get(link)

        color_button_xpath = "/html/body/main/section[1]/div/div/section[1]/div/div[2]/div[3]/div/button[4]/span[1]"

        try:
            ActionChains(driver).send_keys(Keys.ESCAPE).perform()

            color_button = driver.find_element_by_xpath(color_button_xpath)
            color_button.click()

            size_select = driver.find_element_by_id('Option1')
            size_select.click()

            save_screenshot(driver, SCREENSHOT_NAME)
        except ElementClickInterceptedException:
            save_screenshot(driver, SCREENSHOT_NAME, 'error')
            print('Error - saved screenshot')

        print('Success')
How I got here:
When I inspected the element I saw that there was a much simpler way to get the size dropdown (by using the id
"Option1"). I didn't need to usexpathhereI also added the
save_screenshotmethod so I could quickly see if what I had was yielding what I wanted so far.Run the program
$ docker run -v /Users/jianajavier/workspace/back_in_stock:/back_in_stock back_in_stockCheck the screenshot located in
/Users/jianajavier/workspace/back_in_stock/screenshots
- Good. This is what we want.
Now to check if the size we want is available, we will see if the text in the option contains "SOLD OUT" or "WATILIST". If it does not, then we will email ourselves.
When the item is not in stock, the element for the size dropdown option looks like this:
<option class="" value="L/XL">L/XL - Waitlist</option>Through Selenium, let's get the element using xpath.
def skims(driver):
    f = open("skims.txt", "r")

    for link in f:
        link = link.strip("\n")
        driver.get(link)

        color_button_xpath = "/html/body/main/section[1]/div/div/section[1]/div/div[2]/div[3]/div/button[4]/span[1]"

        try:
            ActionChains(driver).send_keys(Keys.ESCAPE).perform()

            color_button = driver.find_element_by_xpath(color_button_xpath)
            color_button.click()

            size_select = driver.find_element_by_id('Option1')
            size_select.click()

            size_option = driver.find_element_by_xpath("//option[@value='L/XL']") # Add this line

            save_screenshot(driver, SCREENSHOT_NAME)
        except ElementClickInterceptedException:
            save_screenshot(driver, SCREENSHOT_NAME, 'error')
            print('Error - saved screenshot')

        print('Success')
And now we need to get it's text.17
def skims(driver):
    f = open("skims.txt", "r")

    for link in f:
        link = link.strip("\n")
        driver.get(link)

        color_button_xpath = "/html/body/main/section[1]/div/div/section[1]/div/div[2]/div[3]/div/button[4]/span[1]"

        try:
            ActionChains(driver).send_keys(Keys.ESCAPE).perform()

            color_button = driver.find_element_by_xpath(color_button_xpath)
            color_button.click()

            size_select = driver.find_element_by_id('Option1')
            size_select.click()

            size_option = driver.find_element_by_xpath("//option[@value='L/XL']")
            size_text = size_option.text

            save_screenshot(driver, SCREENSHOT_NAME)
        except ElementClickInterceptedException:
            save_screenshot(driver, SCREENSHOT_NAME, 'error')
            print('Error - saved screenshot')

        print('Success')
Let's check if
size_textcontains either "Sold out" or "Waitlist"def skims(driver): f = open("skims.txt", "r") for link in f: link = link.strip("\n") driver.get(link) color_button_xpath = "/html/body/main/section[1]/div/div/section[1]/div/div[2]/div[3]/div/button[4]/span[1]" try: ActionChains(driver).send_keys(Keys.ESCAPE).perform() color_button = driver.find_element_by_xpath(color_button_xpath) color_button.click() size_select = driver.find_element_by_id('Option1') size_select.click() size_option = driver.find_element_by_xpath("//option[@value='L/XL']") size_text = size_option.text.lower() # We should do lower so we don't mismatch because of case not_in_stock_words = ['waitlist', 'sold out'] not_in_stock = [item for item in not_in_stock_words if item in size_text] if not_in_stock: # Then the item is NOT in stock except ElementClickInterceptedException: save_screenshot(driver, SCREENSHOT_NAME, 'error') print('Error - saved screenshot') print('Success')
Test to see if our email sending works when the item is not in stock.
def skims(driver):
    f = open("skims.txt", "r")

    for link in f:
        link = link.strip("\n")
        driver.get(link)

        color_button_xpath = "/html/body/main/section[1]/div/div/section[1]/div/div[2]/div[3]/div/button[4]/span[1]"

        try:
            ActionChains(driver).send_keys(Keys.ESCAPE).perform()

            color_button = driver.find_element_by_xpath(color_button_xpath)
            color_button.click()

            size_select = driver.find_element_by_id('Option1')
            size_select.click()

            size_option = driver.find_element_by_xpath("//option[@value='L/XL']")
            size_text = size_option.text.lower()

            not_in_stock_words = ['waitlist', 'sold out']
            not_in_stock = [item for item in not_in_stock_words if item in size_text]

            if not_in_stock:
                save_screenshot(driver, SCREENSHOT_NAME)
                send_email(prepare_email(link))

        except ElementClickInterceptedException:
            save_screenshot(driver, SCREENSHOT_NAME, 'error')
            print('Error - saved screenshot')

        print('Success')
You should have received an email with a screenshot of the page.
Change it to
if not not_in_stock:since that's what we really want.
def skims(driver):
    f = open("skims.txt", "r")

    for link in f:
        link = link.strip("\n")
        driver.get(link)

        color_button_xpath = "/html/body/main/section[1]/div/div/section[1]/div/div[2]/div[3]/div/button[4]/span[1]"

        try:
            ActionChains(driver).send_keys(Keys.ESCAPE).perform()

            color_button = driver.find_element_by_xpath(color_button_xpath)
            color_button.click()

            size_select = driver.find_element_by_id('Option1')
            size_select.click()

            size_option = driver.find_element_by_xpath("//option[@value='L/XL']")
            size_text = size_option.text.lower()

            not_in_stock_words = ['waitlist', 'sold out']
            not_in_stock = [item for item in not_in_stock_words if item in size_text]

            if not not_in_stock:
                save_screenshot(driver, SCREENSHOT_NAME)
                send_email(prepare_email(link))

        except ElementClickInterceptedException:
            save_screenshot(driver, SCREENSHOT_NAME, 'error')
            print('Error - saved screenshot')

        print('Success')
To Add More Links or Stores
Create a new
store.txtfile and follow the steps above to create a new method to handle it.We need separate
store.txtfiles because we have to handle different websites in different ways as you saw above for Lululemon, Everlane, and SkimsIf you want more links for a certain store, you can put them on new lines in your
store.txtfileFor example
skims.txthttps://skims.com/products/cozy-knit-robe-stone https://skims.com/products/cozy-knit-robe-boneThis line loops through each link within the text file and will email us separately for each item.
for link in f:
You can delete
everlane.txt,lululemon.txt,skims.txtand their corresponding methods once you've verified everything's working!
And now, you're actually done.
It's been nice a long journey, my friends. If you got here, and you've done it, congratulations! I know this was a lot but I hope you've learned a thing or two and feel empowered to use your newfound knowledge to create more.
Most importantly, I hope this helps you free up some time to be onto bigger and better things than repeatedly checking your favourite store's online website.
There's some extra information below if you're interested as well.
Let's embark on this mission to automate our worlds one script at a time. See you on the other side!
Jiana
APPENDIX
General
Anytime you make a code change, test it by running18
On a
launchdsetup- If your computer is off at the time the script is to run, it won't run until you've started it up again. Mine has run even on sleep, but it's not always reliable
On a cron setup
- You'll need to use a special type of cron in order to mimic the run on startup functionality
If the website changes their layout, you may need to update and re-test your method in
back_in_stock.py
Why are we using Docker?
- We're using Docker here because our program needs certain libraries (which are existing code that we can publicly use) in order to do certain things
- For example, it uses Selenium to interact with the browser
- These libraries have numerous versions and requirements that need to be on the machine running the script
- Docker makes it so that we can all easily use the same library versions, and won't run into trouble with these program "prerequisites"
- If we don't use Docker, it will be much harder to ensure your setup and my setup are exactly the same
- Docker gives us this ability because instead of us each having these "prerequisites" on our own machines, they are hosted on an external machine that we connect to through the internet, and our script is instead run there
Experience with Coding
If you have coding experience, here is what I did at a high level.
- Create a new email with an app password to send notifications from (or use mine2)
- Use Python library Selenium to interact with the browser
- Navigate to the link, click the necessary buttons on the page, and check if the add button is enabled (site-dependent)
- Save screenshot and use
smtplibto send the notification from our newly created email - Run script everyday at indicated time via
launchd(Mac). I chose launchd so that if my computer was off at the time the script would have run, it will run on startup. You can use anacron or whatever you'd like to do this on a different OS.
Notes
- I did this with Docker to make this easily distributable without having to get others to use a
virtualenvwith Python. I always have an annoying time with Python environment setups, so I felt it would be nice to use Docker here.- If you're using Docker also, you can take a look at some of the problems I ran into when my screenshots weren't saving to my local project folder
- The rest of the tutorial can be broken down into six parts.
- Modifying the code from my repository
- Testing the script
- Setting up the job
- Testing the job
- Tweaking the script for different online website layouts
- Debugging
New Learners with Coding
A few terms
- I use script and program interchangeably here
- When I say command, I am referring to an instruction that we give to our computer, usually via our terminals (which are the way we talk directly to our computer without a graphical user interface/GUI)
- $ means terminal prompt
The Helper Methods
If you're interested, here's more context on prepare_email, save_screenshot and send_email methods.
prepare_emailis a method that is already written for you inback_in_stock.pyto pass tosend_emailAll it needs is the link in order to work
prepare_email(link)def prepare_email(link): # Set email parameters email_params = {} subject = "Back in Stock!" email_params['subject'] = subject email_params['body'] = """ <p>%s</p> <p>Screenshot<br/> <img src="cid:image1"> </p> """ % link email_params['screenshot_name'] = SCREENSHOT_NAME return email_params
You can take a look at these methods within
helpers/web_helper_methods.py, but for your curiosity, I've added some comments to explain these methods belowdef save_screenshot(driver, screenshot_name, error = ''): os.makedirs("screenshots", exist_ok=True) # Make directory 'screenshots' in your project folder screenshot_name = "screenshots/%s%s" % (error, screenshot_name) # Screenshot name defined as SCREENSHOT_NAME in back_in_stock.py driver.save_screenshot(os.path.abspath(screenshot_name)) # Save the screenshot in the screenshots directorydef send_email(params): # Define the to and from emails from_email = FROM_EMAIL to_email = TO_EMAIL # Set up message subject and address params msg = MIMEMultipart('related') msg['Subject'] = params['subject'] msg['From'] = from_email msg['To'] = to_email # Create the body of the message. html = params['body'] # Get the screenshot that we just saved in save_screenshot and insert into email screenshot_name = "screenshots/%s" % params['screenshot_name'] img_file = open(os.path.abspath(screenshot_name), 'rb') img = img_file.read() msgImg = MIMEImage(img, 'png') msgImg.add_header('Content-ID', '<image1>') msgImg.add_header('Content-Disposition', 'inline', filename=screenshot_name) # Record the MIME types (we're sending this email as an html) msgHtml = MIMEText(html, 'html') msg.attach(msgHtml) msg.attach(msgImg) # Send the prepared from your FROM_EMAIL using your APP_PASSWORD server = smtplib.SMTP_SSL('smtp.gmail.com', 465) server.login(from_email, APP_PASSWORD) server.sendmail(from_email, to_email, msg.as_string()) server.quit()
Learning about Docker Volumes
The first time around I did this, the screenshots directory wasn't saving to my local folder, and this is how I found out the issue:
I knew it had something to do with using Docker, because when I originally tried this without Docker, it worked no problem. Look here to find out what the issue was and why.
After doing some digging, I learned about Docker volumes. I won't go into details because I'm not an expert, but I essentially needed to map my Docker container's working directory to a directory on the host (my computer) in order to create the folder and save the files to my machine
- My S.O. knows a lot more about Docker than me, and he showed me when jumping into the Docker container (I didn't know I could do this before), the folder was there
This led to adding these lines to my
Dockerfile. I believe these tell Docker where on my local machine to map what the container is doing to.VOLUME /back_in_stock WORKDIR /back_in_stockAnd thats how I found out I need to run my program using this command:
docker run -v /Users/jianajavier/workspace/back_in_stock:/back_in_stock back_in_stock- This maps my local folder (
/Users/jianajavier/workspace/back_in_stock) to the volume Docker is using/back_in_stock - This is what allows me to save the screenshots (or any file I would want to save written by my program) on my computer
- Note: I put all this in
commands.mdas a reminder
- This maps my local folder (
You likely will not have experienced this because I already put the commands in your Dockerfile and we've been running this command to test all along
Debugging
In order to see if I could actually get the colour button through the code, I added a breakpoint (a point where the code stops after we run it where we can interact with the code live) by inserting
pdb.set_trace()where you want the program to stopdef skims(driver): f = open("skims.txt", "r") for link in f: link = link.strip("\n") driver.get(link) pdb.set_trace() color_button = driver.find_element_by_xpath("/html/body/main/section[1]/div/div/section[1]/div/div[2]/div[3]/div/button[4]/span[1]")Now I run in interactive mode:
$ docker run -it -v /Users/jianajavier/workspace/back_in_stock:/back_in_stock back_in_stock

> /back_in_stock/back_in_stock.py(51)skims()
-> color_button = driver.find_element_by_xpath("/html/body/main/section[1]/div/div/section[1]/div/div[2]/div[3]/div/button[4]/span[1]")
(Pdb)
First let's see if we can get the element. I will enter part of the line that's about to run next in the console (indicated by
->) without thecolor_button =part (which saves the output to a variable) because I want to see the output on the screen.-> color_button = driver.find_element_by_xpath("/html/body/main/section[1]/div/div/section[1]/div/div[2]/div[3]/div/button[4]/span[1]") (Pdb) driver.find_element_by_xpath("/html/body/main/section[1]/div/div/section[1]/div/div[2]/div[3]/div/button[4]/span[1]") <selenium.webdriver.remote.webelement.WebElement (session="008b4713ac0bca3399cdb15ade383fa3", element="d383ba17-e8c0-4ea7-abcf-01bcedb61d18")>Great, it returned a Selenium WebElement. Now I know I can find the color button on the page. I'll press
nto execute the next line which will save the output<selenium.webdriver.remote.webelement.WebElement (session="008b4713ac0bca3399cdb15ade383fa3", element="d383ba17-e8c0-4ea7-abcf-01bcedb61d18")>to the variable
color_button-> color_button = driver.find_element_by_xpath("/html/body/main/section[1]/div/div/section[1]/div/div[2]/div[3]/div/button[4]/span[1]") (Pdb) n > /back_in_stock/back_in_stock.py(46)skims() -> for link in f: (Pdb) color_button <selenium.webdriver.remote.webelement.WebElement (session="132f274803d4e0760a994fa0ff7edcab", element="76e66729-cf4f-4017-a4a9-ebc9f1aec43f")>Great! Now we want to click
color_button. These are all the ways I can interact with the page through Selenium. However, we'll just try to useclick()for this purpose. Still in the debugger, let's try it.(Pdb) color_button.click()You'll notice we get an error (If you don't get this error, it's okay, but you can still read on to learn how I solved for it if you'd like)
*** selenium.common.exceptions.ElementClickInterceptedException: Message: element click intercepted: Element <span class="config__color-inner swatch" data-color="STONE" style="background-color: rgb(194, 184, 176);"></span> is not clickable at point (1036, 374). Other element would receive the click: <div class="needsclick Modal__ModalPortalStyled-sc-1oy3zf1-0 RaFgj klaviyo-form kl-private-reset-css-Xuajs1" formtype="POPUP" overlaycolor="rgba(20,20,20,0.13)" modalscale="1">...</div>
  (Session info: headless chrome=85.0.4183.102)
Hm. It says our element click was intercepted. Wonder what happened. Fortunately, we can use the
save_screenshotmethod in ourhelpers/web_helper_methods.pyto save a screenshot locally and see what the page looks like at this point in our program. Let's try it within the debugger.(Pdb) save_screenshot(driver, SCREENSHOT_NAME)Cool. Looks like it saved. This should save to a directory called
screenshotsthat will be created in our working directory (./back_in_stock/screenshots/).19 Let's open the screenshot and take a look.When we take a look at the screenshot, we can finally see what went wrong.
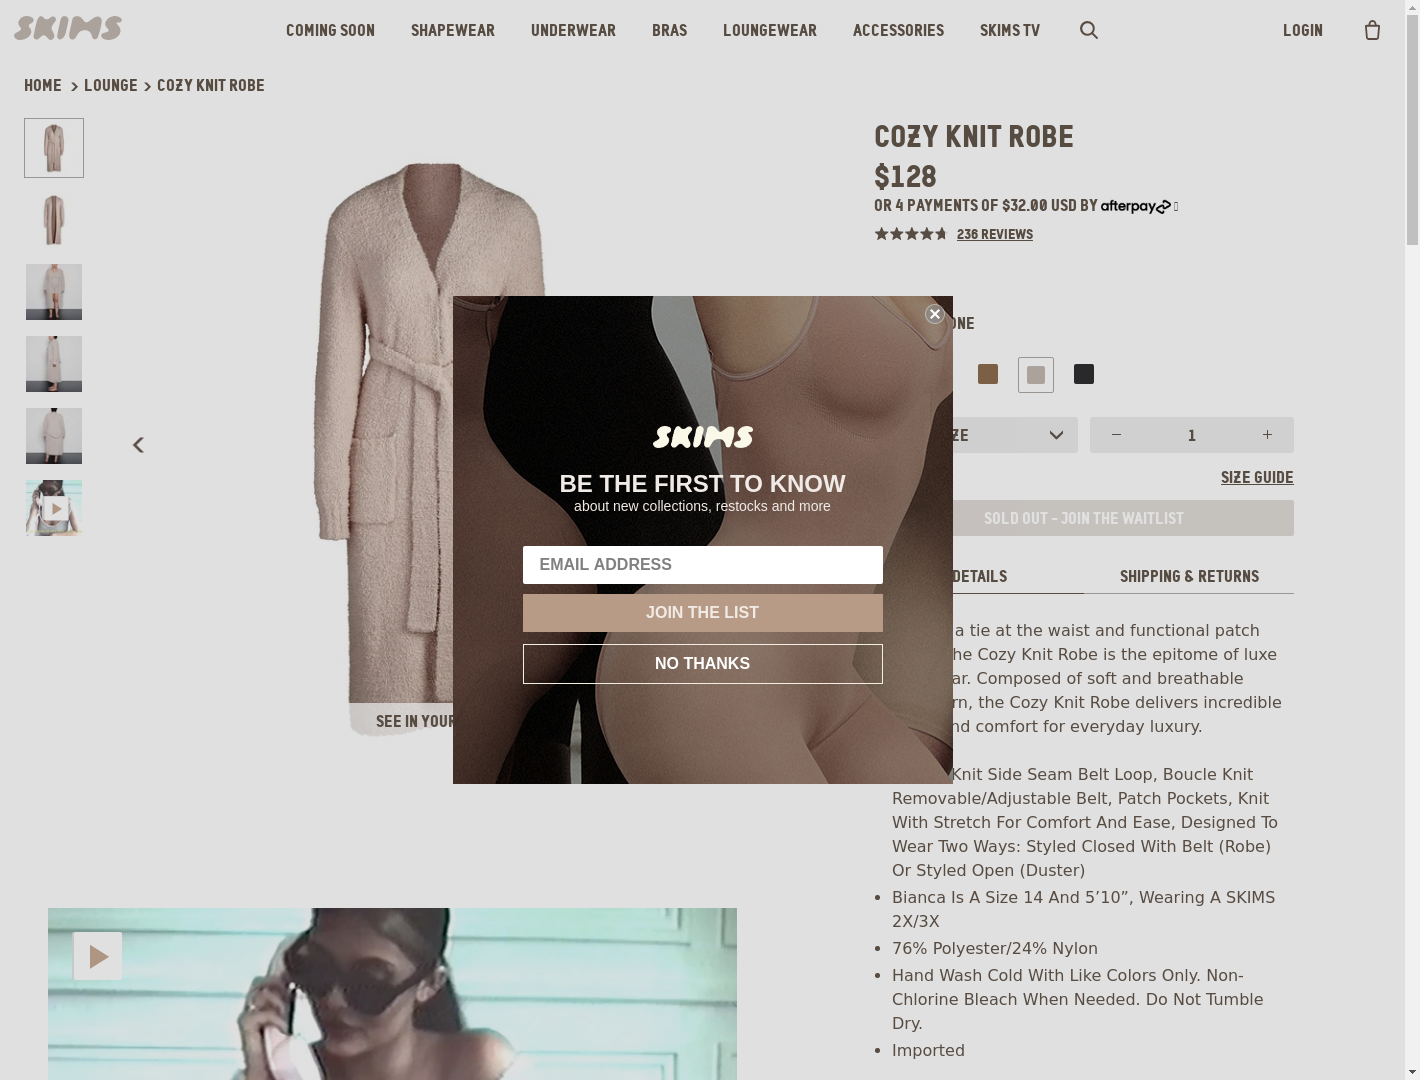
A popup got in the way!
So let's add error handling and screenshot saving and re-run the program. Don't forget to import the error so we can catch it properly.
  #...
  from selenium.common.exceptions import NoSuchElementException, InvalidArgumentException, ElementClickInterceptedException # Added ElementClickInterceptedException to import the error
  #...


  def skims(driver):
      f = open("skims.txt", "r")

      for link in f:
          link = link.strip("\n")
          driver.get(link)

          try:
              color_button = driver.find_element_by_xpath("/html/body/main/section[1]/div/div/section[1]/div/div[2]/div[3]/div/button[4]/span[1]")
              color_button.click()
          except ElementClickInterceptedException: # Catching the error
              save_screenshot(driver, SCREENSHOT_NAME)
              print('Error - saved screenshot')
  $ docker run -it -v /Users/jianajavier/workspace/back_in_stock:/back_in_stock back_in_stock
  Error - saved screenshot
- This is similar to the Everlane website. There are a few ways to get around this, like clicking on anywhere else on the page, but I think the easiest is just to press
ESCon the page first (like we did for Everlane)
ActionChains(driver).send_keys(Keys.ESCAPE).perform()
- So now, our code for
skimsshould look like this
  def skims(driver):
      f = open("skims.txt", "r")

      for link in f:
          link = link.strip("\n")
          driver.get(link)

          color_button_xpath = "/html/body/main/section[1]/div/div/section[1]/div/div[2]/div[3]/div/button[4]/span[1]"

          try:
              ActionChains(driver).send_keys(Keys.ESCAPE).perform()

              color_button = driver.find_element_by_xpath(color_button_xpath)
              color_button.click()
          except ElementClickInterceptedException:
              save_screenshot(driver, SCREENSHOT_NAME)
              print('Error - saved screenshot')

          print('Success')
- What we did:
- Put the xpath in a variable because it was looking a bit cluttered
- Added the
ESCbutton press - Added a line to print 'Success'
When we run it again, let's see if we get a 'Success' message which will tell us if we have successfully clicked and selected the color button
$ docker run -it -v /Users/jianajavier/workspace/back_in_stock:/back_in_stock back_in_stock
Success
Woot woot!
Cliffnotes
I don't know if this will work the exact same with Windows or Linux. I think it will because we'll be using Docker but I give no guarantees. I'll update this once I've tested with those machines.
If you really don't want to create a new email address, you can use the creds from here.
This is taking a folder I've uploaded (onto my github) and downloading it into a folder on your computer.
Constants are variables in the code that should not change when the code is run.
You may have to tweak
back_in_stock.pyto find the correct elements on the page if you change to a link that has a slightly different layout.Docker build meaning we are make sure we have all the necessary prerequisites to run the code
Docker run to actually execute the code on the docker container (the machine that we're running our code on)
For example, on my computer, mine is:
/Users/jianajavier/workspace/back_in_stock/logs/An alias is like a shortcut for another command
If you write another script, you can use this same command and just replace
back_in_stockwith whatever you named the.plistfile. Example: (local.cool_thing_to_do.plist)$ alias reload_cool_thing_to_do='launchctl unload -w /Library/LaunchDaemons/$(ls /Library/LaunchDaemons/ | grep cool_thing_to_do) && launchctl load -w /Library/LaunchDaemons/$(ls /Library/LaunchDaemons/ | grep cool_thing_to_do)' $ reload_cool_thing_to_doIf it's your first time calling this, you may get an error that says unrecognized job, but don't worry, this is because it tried to unload first and then reload, but we didn't have anything to unload at first.
Python code that begins with
#are comments in the code and are not executed when the code is run. You don't need to add this when you're following along with the code.# This is a commentSelenium is the library that allows us to interact with the browser through our Python code.
Here are all the things we can find by using selenium.
Note there are no colour-defining classes for us to use to find by class like the Lululemon example
This uses the absolute xpath. If the page changes, you may have to look up the xpath again.
I don't just come up with this code out of nowhere. Below are the steps I take. For an in depth tutorial, see testing your code)
Inserting a breakpoint where I want to add the new code.
Looking stuff up online like Selenium python find by value and Selenium python get text from element
Running the program in interactive mode and experiment with the suggestions I found online to fit my needs
$ docker run -it -v /Users/jianajavier/workspace/back_in_stock:/back_in_stock back_in_stock
When I say "Test" I am referring to running the code via the commands:
- If you are debugging (have a
pdb.set_trace()in your code):$ docker run -it -v /Users/jianajavier/workspace/back_in_stock:/back_in_stock back_in_stock - If you are not debugging:
$ docker run -v /Users/jianajavier/workspace/back_in_stock:/back_in_stock back_in_stock
- If you are debugging (have a
See Learning about Docker Volumes to learn about the issues I ran into when running this.